Wednesday, 18 September 2013

Cider


There are a few avenues that can be used to justify the brewing of cider... The fact that the colleges alcohol ban has just been lifted, I come from the west country so it's almost mandatory, we were given a crate of pairs for free or the fact that brewing alcohol has been a tradition within Christian institutes  for centuries. But the fact that it is just an interesting/amusing thing to do was probably a more significant factor in this evenings activities.


It takes a surprisingly short amount of time to conceptualise, plan and execute the production of cider. From the discovery that a crate of pears was up for grabs to sealed jars of pear juice waiting to ferment was no more than an hour. Tidy work for a Wednesday evening.


While making cider is an art form; developed, tweaked and perfected by professionals (monks) over the years it is actually very simple to make a plain old brew. With a 5 minute google search it is easy to find a recipe that involves less than 3 ingredients (results may vary)


Of course when a whole crate of fruit presents itself, it comes with the opportunity to experiment! For the first batch we decided to go purist - no added yeast, nothing fancy just pear juice and touch of sugar... okay a fist full of sugar.


Things seemed to go our way, we happened upon an old juicer (it required a thorough cleaning) which saved us the curfuffle of pressing the pears by hand. In hindsight it would have probably been a pretty spectacular fail if we hadn't found the juicer.


Juicing pretty much anything tends to leave one in possession of rather a lot of pulp, we have thought about it a bit and a few ideas have been banded about including pear flavored home made sausages, pear jam, pear cake?! Anyway if you have a good idea for what to do with it and better still if you can provide proper instructions/ recipe then maybe we will make it ... maybe.
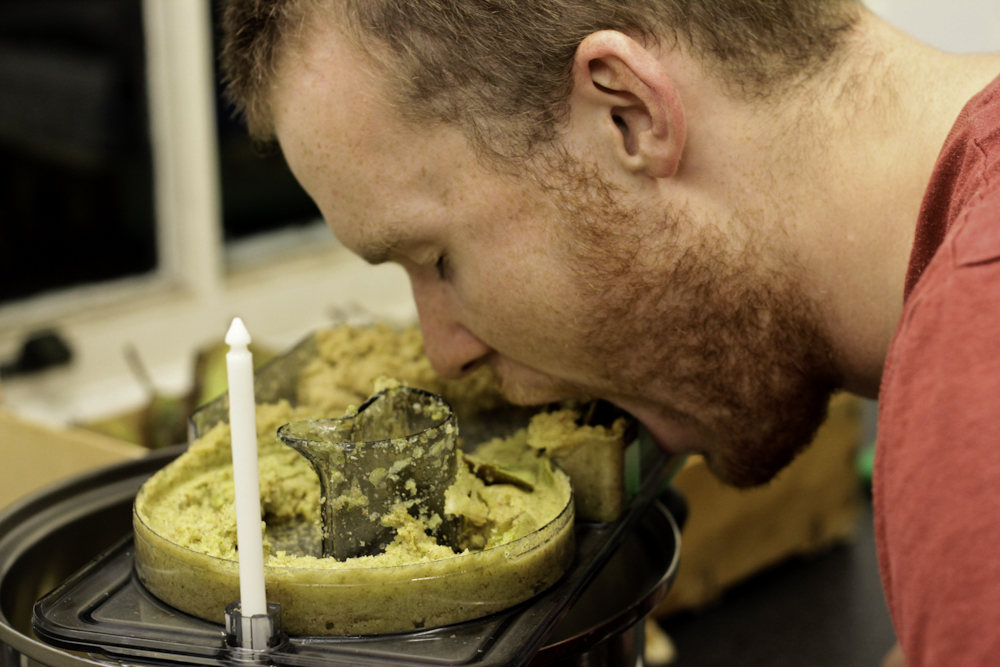

Until then David is going to have to figure out a green solution for disposing of it.


This is the slightly disgusting-looking result of 'juicing' the pairs... then just to sieve and store it


In other news our South African got bored of waiting and raided our warm dry cupboard full of meat ... the results were rather enjoyable...


So now you can know that the instructions in my previous post do actually result in delicious biltong. We now have room to experiment with some more exotic recipes.

Title font used: 'Lost Highway' 

Saturday, 14 September 2013

Biltong


My time in South Africa gave me a taste for a number of different things but among the most treasured flavours lies biltong. South Africa is famed for its love of red meat (something that I get along with just fine) and it is therefore unsurprising that they have managed to produce some of the more creative ways of preparing it. At its invention biltong was purely a practical solution to the problem of storing meat for long periods of time without the ability to freeze it. What it has now become is something of an art form of infusing meat with the richest and most mouth watering flavours. 


For this reason when a friend at college asked me if I would be interested in constructing a 'biltong box' it didn't really require much deliberation. (Yes he is a South African)


While meat in the UK is still WAY more expensive than it is in SA it is still significantly cheaper to make your own biltong than it is to buy it from a south African food dealer - plus it is a lot more fun.


So before term started we decided to get the real work out of the way first and construct ourselves a biltong box and put it to use. As I type 2kgs of beef is gently marinating in the fridge patiently waiting to get strung up and dried out. 


Making biltong is actually very easy and taking inspiration from another friend who likes to blog about her recipes I though I would give you a little run down of how to produce this legendary snack ...


Constructing the box:

  • a cardboard box
  • some doweling
  • some form of hook (we are using paperclips) 
  • a fan
  • a dry, well ventilated room
  • some duct tape (endlessly useful)


The idea is to construct a small structure that allows you to hang pieces of meat that will be able to dangle freely without being contaminated with bugs, dust or any other less tasty substance.
We simply poked doweling through both sides of the cardboard box and taped up all the joins to make it more stable.


Cutting a hole that the fan will blow through to circulate air

Preparing the meat:

Beef is a pretty safe bet and you should probably stick to that, get as much or as little as you want but it is likely that whatever amount you buy you will later regret not getting more.


  • Salt (really quite a lot but it depends on the amount of meat you have)
  • Spices - this is where it gets fun because you can really do whatever you want, whatever you think will taste good as a marinade then you can use that. A fairly safe bet is to go for black pepper, whole coriander and chili powder but many will also add vinegar sugar and a whole host of other ingredients.


First cut your meat into ribbons, the size will probably depend to the size of your box but a decent steak thickness should be about right. Place the meat into a tray for marinating. Rub the salt evenly into the meat, now take your various spices and rub them in too.
If you do use black pepper it is best to get the actual seeds and crush them with a pestle and mortar rather than using a pepper mill as this will be too fine, the same goes for the whole coriander.


Put the tray into a fridge (cling film it unless you want your fridge to stink of meat) and leave it there for a day or two. Now take it out and hang it in your box and leave it to dry for between 5-10 days depending on how dry you want it.


You can also simply search for others biltong recipes to find one that takes your fancy more than this one - there are a whole host of them out there.


Title font used: 'Ultimate Midnight'